Part #1 of our series on building web console for Elixir & Phoenix applications with Phoenix LiveView.
In this series:
- Part 1: Project set up and simple code executor
- Part 2: Making imports and macros work
- Part 3: Managing multiple supervised sessions
- Part 4: Making it real-time
Video version
Watch the video version below or or directly on YouTube for a complete step-by-step walkthrough.
Setting up the project
The project set up has been based on Phoenix LiveDashboard. I have copied over the LiveDashboard files, batch-renamed the modules and files with sed and find and removed all of the business logic, templates and assets specific to Phoenix LiveDashboard.
What I was left with is a simple infrastructure for a generic LiveView project, that can be mounted under a route of the user’s choice in the application’s Router. We will cover this part in future episodes when the Backdoor will be actually useful to be embedded in production apps.
You can track the initial set up and addition of Tailwind / dummy layout for the Backdoor app by looking at the 4 oldest commnits in project history.
Backdoor LiveView
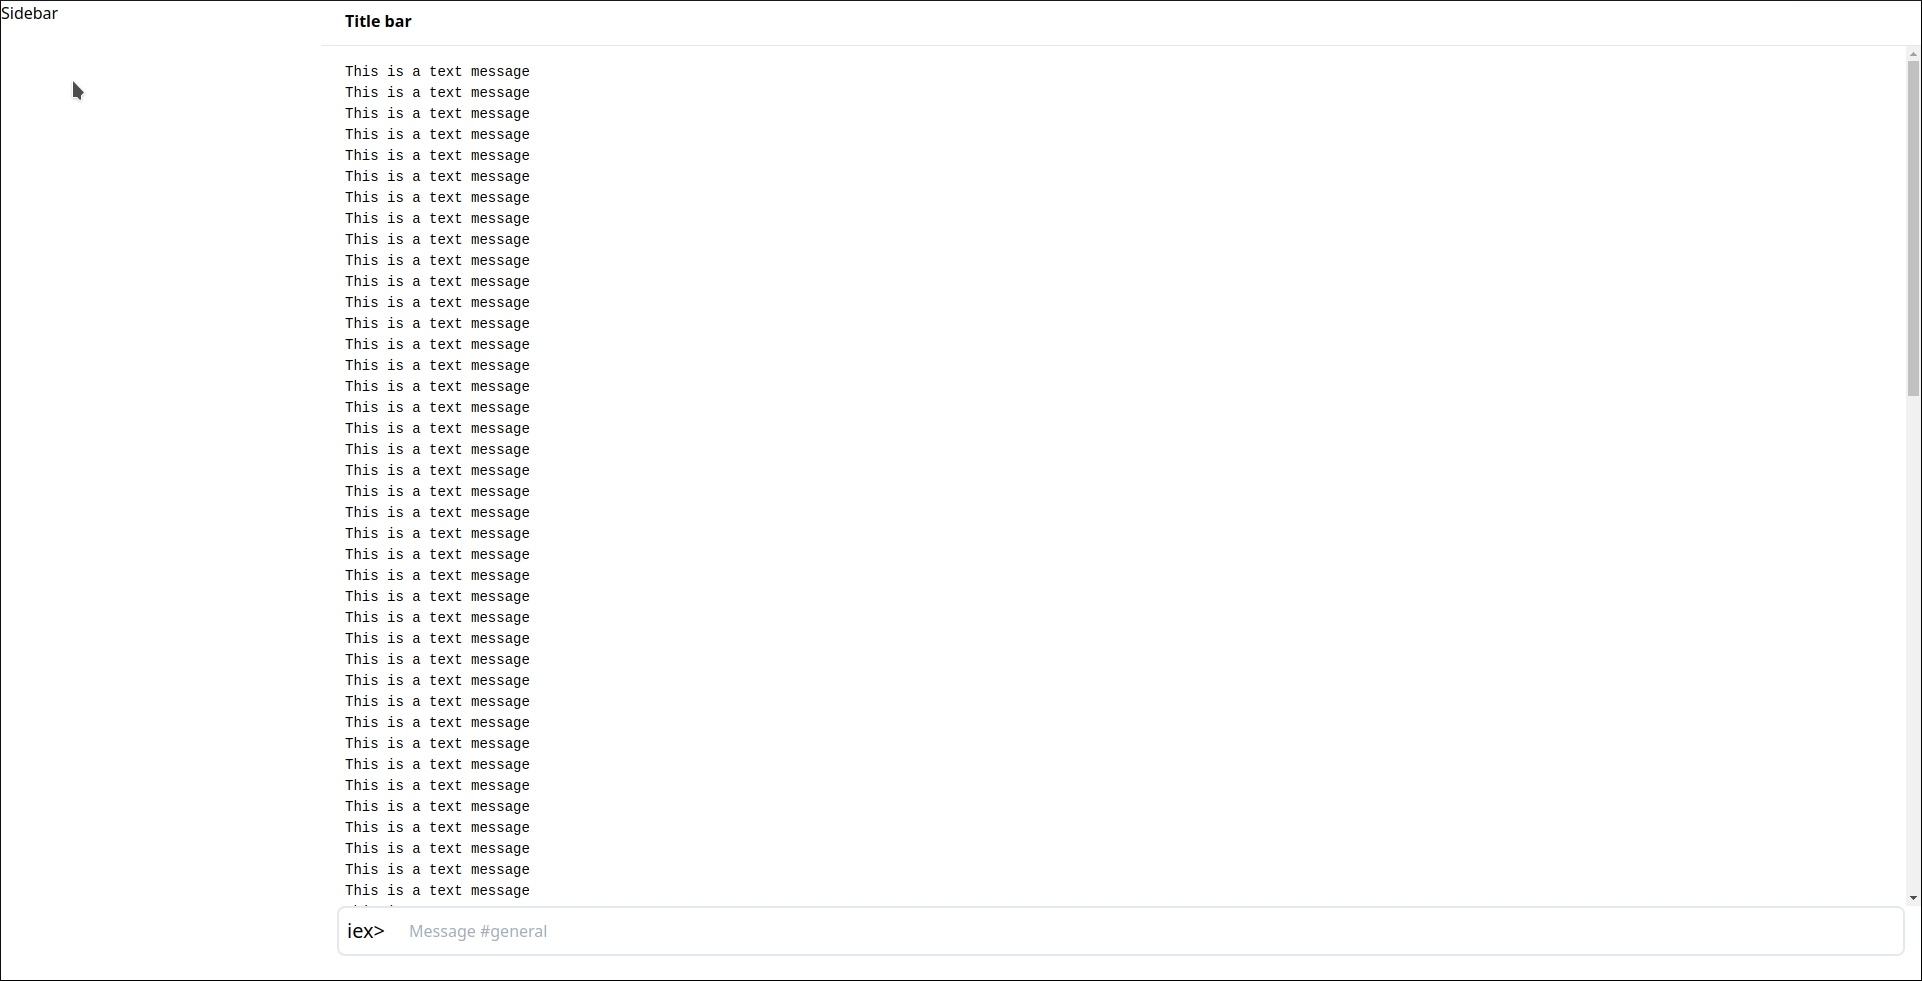
We start off with simple LiveView to render the layout:
defmodule Backdoor.BackdoorLive do
use Phoenix.LiveView,
layout: {Backdoor.LayoutView, "live.html"},
container: {:div, class: "font-sans antialiased h-screen flex"}
use Backdoor.Web, :live_view
@impl true
def mount(_params, _session, socket) do
{:ok, socket}
end
@impl true
def render(assigns) do
~L"""
<div class="font-sans antialiased h-screen flex w-full">
<!-- Sidebar: -->
<div class="flex-none w-1/6 pb-6 hidden md:block">
Sidebar
</div>
<!-- Main column -->
<div class="flex-1 flex flex-col overflow-hidden">
<!-- Titlebar -->
<div class="border-b flex px-6 py-2 items-center flex-none">
<h3 class="text-grey-darkest mb-1 font-extrabold">Title bar</h3>
</div>
<!-- Output -->
<div class="px-6 py-4 flex-1 overflow-y-scroll">
<%= for i <- (1..100) do %>
<div class="flex items-start text-sm">
<pre>This is a text message</pre>
</div>
<% end %>
</div>
<!-- Input -->
<div class="pb-6 px-4 flex-none">
<div class="flex rounded-lg border-2 border-grey overflow-hidden">
<span class="text-xl text-grey border-r-0 border-grey p-2">
iex>
</span>
<input type="text" class="w-full px-4" placeholder="Message #general" />
</div>
</div>
</div>
</div>
"""
end
endPhoenix LiveDashboard authors came up with a way to start testing Phoenix application, which includes and mounts the library: dev.exs file. With this file present, we have a handy method to start the development project with mix dev.
When visiting http://localhost:4000/backdoor one would see the 2-column template we will use for our Backdoor web console:

Executing Elixir code
In order to execute Elixir code we need to do 4 things:
1: Set up bindings, which will become updated after each executed block of code. We will start with simple empty list for the purpose of this demonstration:
...
    @impl true
    def mount(_params, _session, socket) do
    {:ok, socket |> assign(bindings: [], output: [])}
end
...
2: Replace the dummy list of output messages with actual code that takes individual messages from socket.assigns.output list, and prints them all out to the user:
    ...
    <!-- Output -->
    <div class="px-6 py-4 flex-1 overflow-y-scroll">
        <%= for message <- @output do %>
            <div class="flex items-start text-sm">
                <pre><%= message %></pre>
            </div>
        <% end %>
    </div>
    ...
3: Turn the dummy input into LiveView form that sends code to back-end on Enter:
...
<!-- Input -->
<div class="pb-6 px-4 flex-none">
<div class="flex rounded-lg border-2 border-grey overflow-hidden">
<span class="text-xl text-grey border-r-0 border-grey p-2">
iex>
</span>
<%= f = form_tag "#", [phx_submit: :execute, class: "flex w-full"] %>
<%= text_input :command, :text, [placeholer: "Write Elixir code to execute and hit 'Enter'...", value: "", class: "w-full px-4 outline-none"] %>
</form>
</div>
</div>
...4: Finally, execute the code thanks to Elixir’s own Code module:
...
    def handle_event("execute", %{"command" => %{"text" => command}}, socket) do
        {:ok, ast} = Code.string_to_quoted(command)
        {result, bindings} = Code.eval_quoted(ast, socket.assigns.bindings, [])

        output = socket.assigns.output ++ ["iex> " <> command] ++ [inspect(result)]
        {:noreply, socket |> push_event("command", %{text: ""}) |> assign(bindings: bindings, output: output)}
    end
...
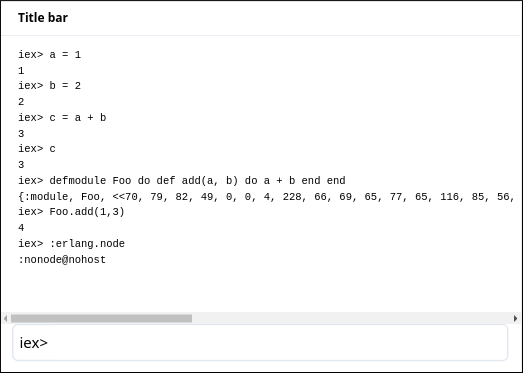
With the full source code for resulting LiveView we can now execute the one-line Elixir code, including sending messages, starting processes, getting system info and defining modules:

Next steps
Our little web console works when you enter valid Elixir one-liners. It doesn’t handle syntax errors, exceptions nor any other problems correctly yet, however. In any failure the whole LiveView will crash and restart. In such a case the output from the commands we already executed is going to be lost as well. It doesn’t capture and output anything sent to :stdout or :stderr either, so puts statements and Logger entries do not get displayed to the user.
In future we will correct these issues, as well as add ability to start sessions within the cluster and persist the sessions beyond the lifespan of LiveView / connected browser, add ability to send multi-line Elixir code for execution, add syntax highlighting, command history and better handle output.
Notes
Watch the screencast directly on YouTube
You can find this and future videos on our YouTube channel.
The full code from this episode can be found on GitHub

Post by Hubert Łępicki
Hubert is partner at AmberBit. Rails, Elixir and functional programming are his areas of expertise.
